Followers

Saturday 23 July 2016

Maude's Summer Edwardian Day Dress at Botanic Gardens

My Dad and I went to the park for some photos and words can't describe how happy I am with the results! This is my best costume yet, and I actually have decent photos, some of which I'm smiling in - I usually feel so camera shy and uncomfortable wearing costume, but today I could hold my head high and talk to people and smile. Quite an achievement for me!


Testing shot to see if my hat was in the right place. Strange, but my hair looks brunette here - I'm blonde.


I'm wearing a belt and gloves with this ensemble, which really makes the outfit, I think.


My hat blew off at this point and I was laughing at what a spectacle I was making in the park! Some nice people asked me if it was for my communion, so I told them that it's for my costume portfolio as I made the dress. I also got some girls calling me Mary Poppins!


 The back view, at the lake. I'm not too fond of how my costumes look at the back, but here I think it's okay. Not perfect, but okay.

Wednesday 20 July 2016

Maude's Summer Edwardian Day Dress Part 3: The Skirt and Hat

As I mentioned in one of my previous posts, I used French seams to seam my skirt. This was relatively easy, though I ended up with a front panel that was far too small to go around my waist. Therefore, I did the back panel seams normally.

The rest of the skirt was fairly straightforward, however when I came to sew the lace onto the skirt, the lace was short by three inches - very, very annoying! So I sewed it in anyway, and made the skirt less full so that the lace would meet by narrowing the centre back seam. And that's the skirt finished!

Next came the hat, which I used a straw hat I bought from America a couple of years ago as a base, seeing as it was still laying around. Yay for stash busting! The flowers came from IKEA and the netting around the brim was used on the sleeves and overlay on my Maude's Summer Edwardian Day Dress. I simply glue-gunned the embellishments to the hat, as the straw was far too thick to sew through and work with normally. It's plain and a bit boring, but I think it fits in with the casual day wear and summer aesthetics.


Here it is finished! All in all, it's been a great project to work with and relatively straightforward, and it gave me confidence for future historical projects.


Tuesday 12 July 2016

Maude's Summer Edwardian Day Dress Part 2: The Sleeves

Here I have finished off the bodice by sewing on some gathered lace that I bought at Abakhan last weekend, and attaching the lace to the lacy sleeves. I think the lace completes it, in a way, as before the bodice looked rather plain with just the gathered edges. I just love it!


Details of the lace, which is probably the nicest lace I've found so far.

At the moment I'm also sewing the long, flared skirt using French seams. It's going well so far, and looks rather neat. It's the first time I've used French seams before, and I rather like the technique - I'll probably use it again in future projects, as fraying edges on seams always manage to irritate me.

Friday 8 July 2016

1770s Indienne Gown Part 2: Draping a Francaise

First of all I prepared my lining, as Katherine instructed. This was draped by myself using Janet Arnold's Patterns of Fashion 1 as a guideline. I stitched the bodice lining together by machine and pressed all of the seams outwards, with the right side on the mannequin. It fits me pretty well considering I had just eyeballed it and hoped for the best!


Next, I cut my francaise back to 54 inches, which is a period width, and cut the shoulders out, as Katherine recommended. I pinned these shoulders to the lining armholes, and then found the middle of the panel by folding it in half and pinning it to the center back. Then, pleat, pleat, and pleat again! I did a couple of quite deep pleats first, and then some smaller ones over the top of that, with an inch or so of the original two pleats showing beneath. After smoothing down the sides, I pleated two more times on each side. This is the end result, which I'm pretty happy with considering it is my first francaise gown I've attempted!


I really love the colours and delicacy of this print.


Wednesday 6 July 2016

1770s Indienne Gown Part 1: Patterning

Today I started work on patterning my Indienne gown, deciding that it's going to be a self-drafted robe à la française, using Katherine's tutorials and Janet Arnold's Patterns of Fashion book 1 as my guides.
Katherine first of all recommended making a lining that fits your body, so I did that, using Patterns of Fashion as a shape reference for the front and back lining pieces. I used a mannequin and draped the fabric across, pinning it straight and taught as I went. Then I drew some outlines of the book's pattern pieces onto the fabric, creating a front and a back muslin. I transfered this to newspaper print by drawing around the edge (adding roughly one centimetre seam allowance around all edges), and adding some width to the front panel, about an inch or so.

Here you can see it pinned loosely to my mannequin, which is a smaller size than the gown I'm making. When I have some spare fabric or go out to buy some, I shall see if the lining I make is the right size for me, and if it is, roughly, I'll start work on pleating the back of my francaise using my IKEA fabric!


Back


Front and shoulder strap pieces


My reference


Saturday 2 July 2016

Maude's Summer Edwardian Day Dress Part 1: The Bodice and Belt

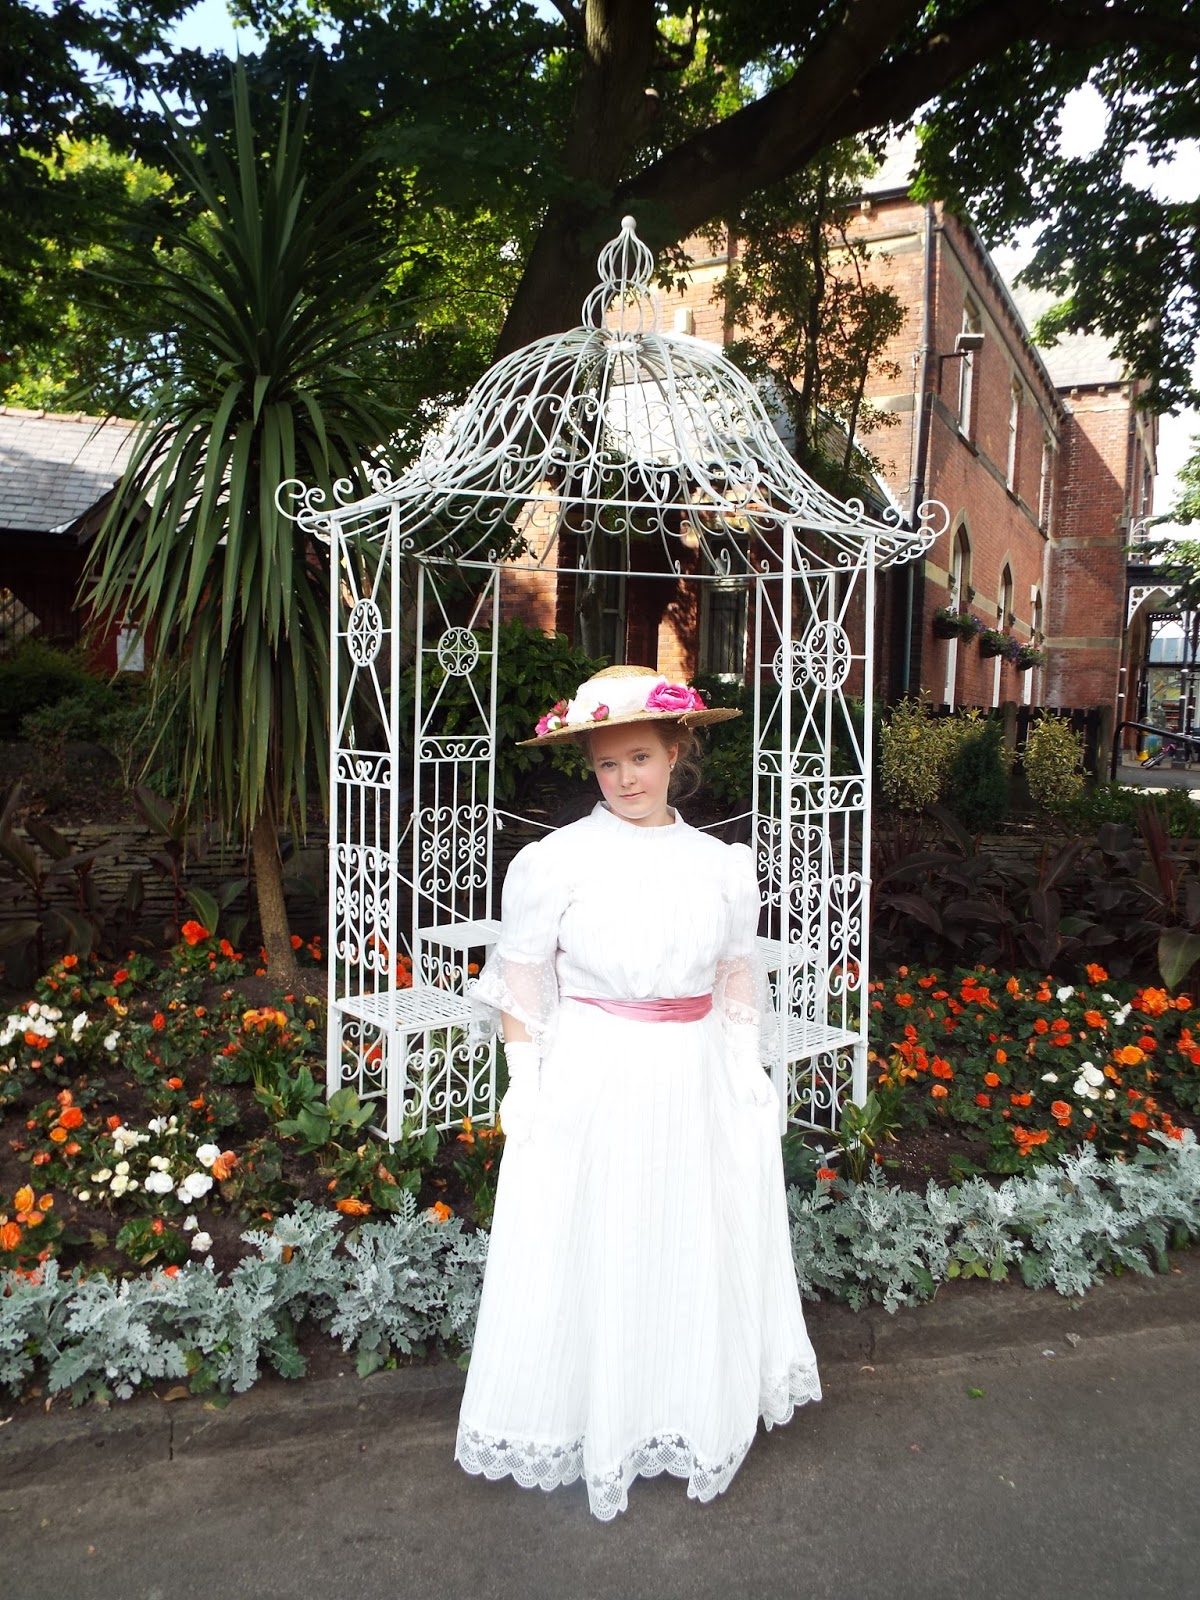
Last week I started on my Maude's Summer Day Dress, using the fabrics that I bought from Abakhan, plus some tulle lace that I purchased from John Lewis on a day out with my mum. I started with the belt because a) I thought it would be easy, I mean, it's just pleats right? and b) it's pink satin!
I was wrong in thinking that pleating pink satin would be easy, as it slipped and slides all over the place and you can hardly get an even pleat! But in the end, it was okay (mostly because my Nana made it for me when I was away for a couple of days, haha), the pleats looked pretty and were secured, and I bought a black frog to use as a closure at the back, as I thought they were cute.


Then I moved on to the bodice. At first the instructions looked daunting, but when you're actually doing it it's okay, and you understand mostly. I really love the lace against the stripes on the bodice, and the little fluffy, baggy area of gathers in the middle! My Nana says that it looks like Cleo's tummy (Cleo being my slightly chubby cocker spaniel) or like a pouch to keep your lunch inside, which always makes me laugh, but it's part of the Edwardian pigeon-breasted look, I think!


The boning I used was steel boning left over from a corset project I never started, which I think works quite well, even if it was a big pain to cut with wire-cutters. For the closure at the back of the bodice, I decided to use a duvet strip of poppers (which is just as secure as a zip, I found) as they are more secure than hooks and bars, and then sewed some little black buttons over the top so that it looks like a blouse. I quite like how it looks with six buttons, but I'm considering adding fifteen buttons instead.


Next came the binding, which I used along my seam allowances and the neck and bottom of the 'blouse'. You can also see the boning channels that I made out of pale blue ribbon.


Next time I post, it will be about the lacy sleeves!